
How to Perform a Structural Analysis in Altair SimSolid with Hydrostatic and Wind Loads
Altair SimSolid is a powerful simulation tool that allows engineers to analyze complex structures without requiring a traditional finite element mesh or the simplification of geometry. This tutorial will guide you through the process of running a structural analysis in SimSolid while applying hydrostatic and wind loads to a model.
For those unfamiliar with these load types, a hydrostatic load would be the pressure exerted by a stationary fluid on a structure. So, an example would be something like water inside of a tank. A wind load is very straightforward, it’s the force exerted by the wind on a structure.
Setting up your study
Once you have your model loaded, apply whatever materials are relevant for your study. Then we can start setting up our study by finding the Analysis menu and selecting Structural Linear.
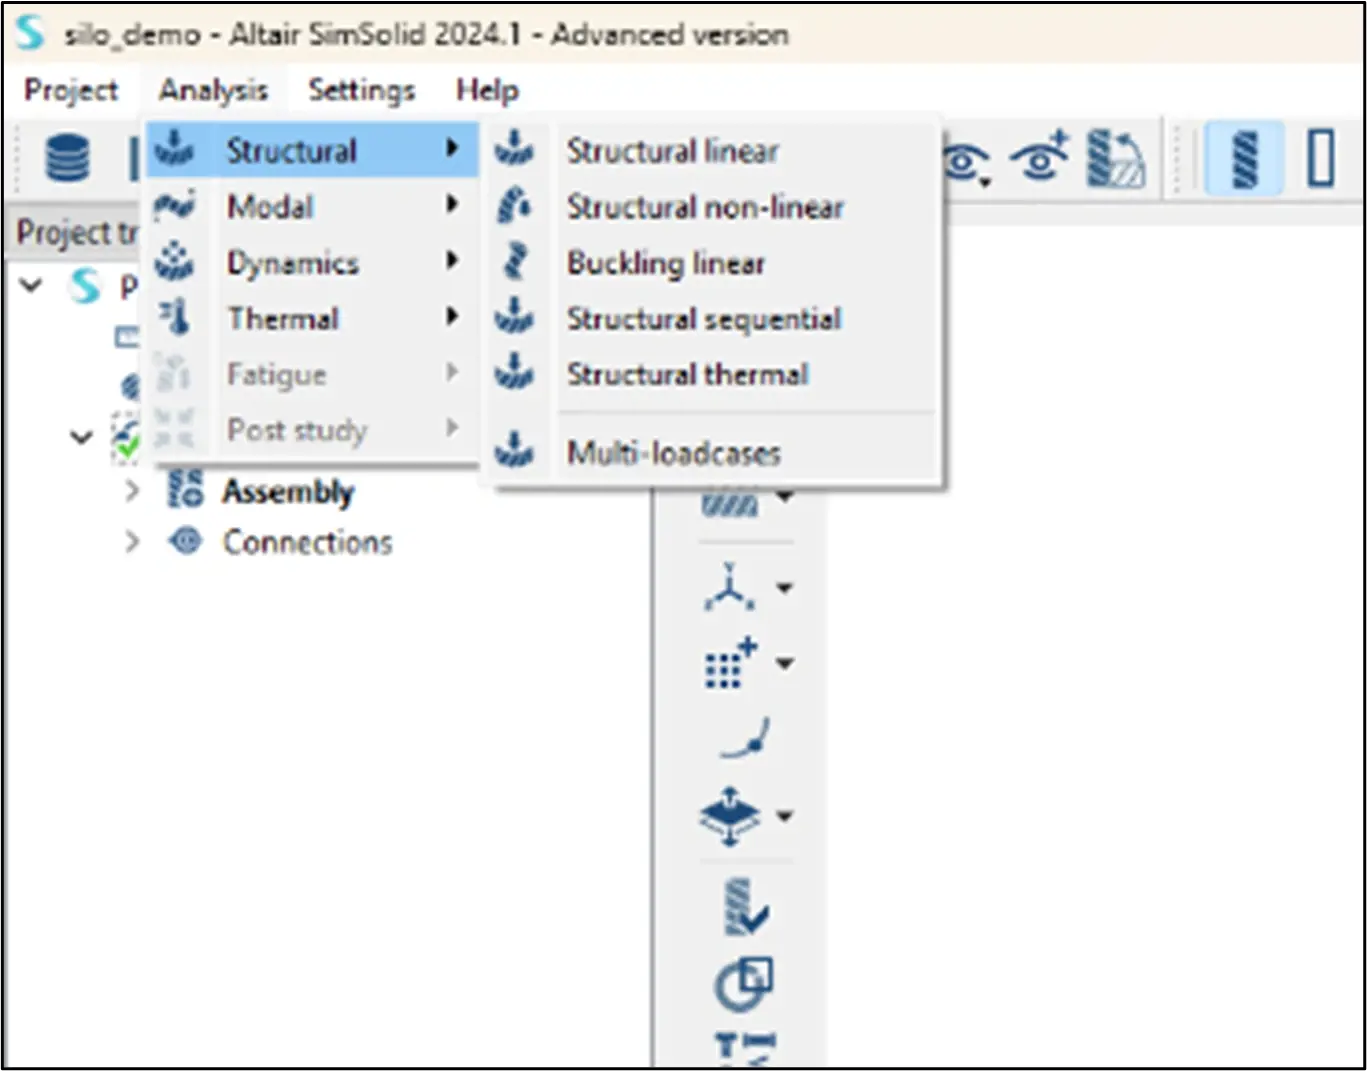
Fig 1: Structural Analysis menu
The next step is to define your constraints. In the icon menu on the left-hand side of the screen, choose the appropriate constraint between Immovable Support, Slider Support, Hinge Support and Spring Support. For example, I am choosing an Immovable support and locking it down on the faces on the bottom of the legs of this tank.

Fig 2: Immovable constraints menu
Before we can start applying the hydrostatic and wind loads, we need to define which direction gravity is in our scenario. Under the Loads menu, choose the 3rd icon down which is a “Gravity Load”, then fill out the fields in the pop-up menu accordingly. For my example, I am going to define gravity as a negative on the Z axis.
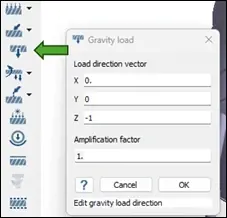
Fig 3: Gravity load menu
Once you hit OK, a pink arrow will appear on your axis indicating the direction of gravity. The next step is to apply the hydrostatic load by finding the Pressure load options and choosing the Hydrostatic load option.
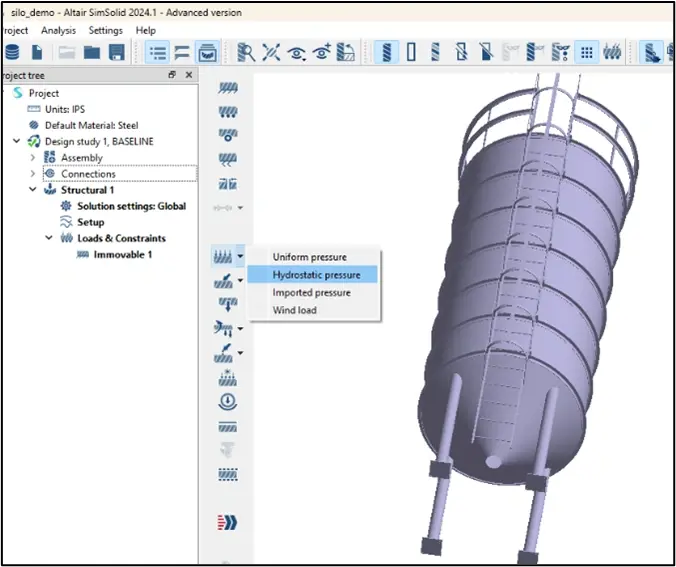
Fig 4: Pressure load menu
With a hydrostatic load, you can choose the location of the surface of the liquid in your study, by either dragging the grid or inputting the coordinates manually. Select the faces that the load needs to be applied to, then be sure you have appropriate values under liquid density and pressure. For my example, I am going with 1000 kg/m3 which is about the density of water; and about 15 psi for the pressure at liquid surface. Once those are complete, choose OK.
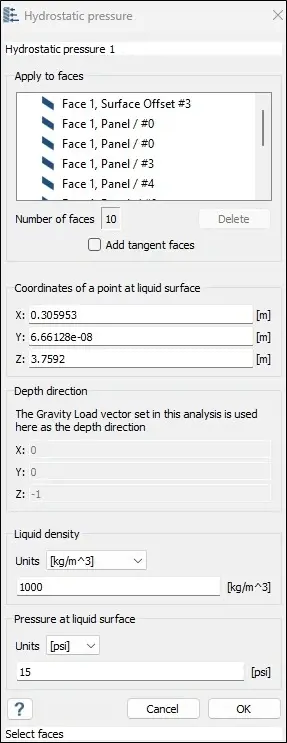
Fig 5: Hydrostatic pressure menu options
Next, go back to your Pressure Load icon and select Wind Load. For this menu, if you want to apply a general load wind direction and location, you can do that in the Ground screen. You can also create a Wind Profile by selecting the Create Profile button. With a Wind Profile, you can add rows and choose variable heights and wind speeds. For my example, I am doing one row of 5 in/sec at 12 inches, then a second row of 15 in/sec at 36 inches.
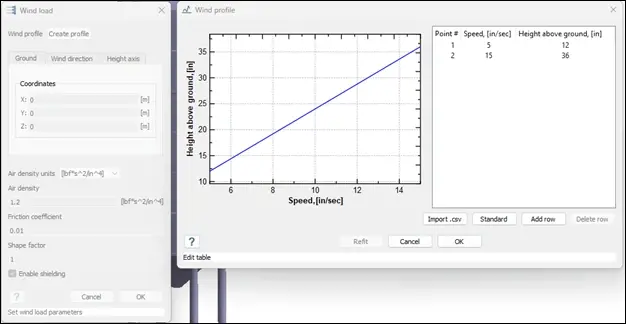
Fig 6: Create Wind Profile menu
You can then choose the “Enable Shielding” option which tells the study to protect parts from the wind load that are obstructed by other parts. You are then ready to solve. Be prepared for the preprocessing of the wind loads to take a little longer than what users are typically used to with a SimSolid analysis but will still be much faster than traditional simulation methods. Once the analysis is done solving you can probe and explore the results as you normally would to gain insights.
Altair SimSolid simplifies structural analysis by eliminating traditional meshing while still providing accurate results. Applying hydrostatic and wind loads helps engineers evaluate structural integrity under realistic conditions. To learn more about Altair SimSolid, don’t hesitate to reach out to us.
